The incredible popularity of home weather stations shows that it’s not just farmers who are interested in the weather. Many people want to be able to track and record weather events within their local environment rather than relying on a state or national weather service that may not have adequate local details.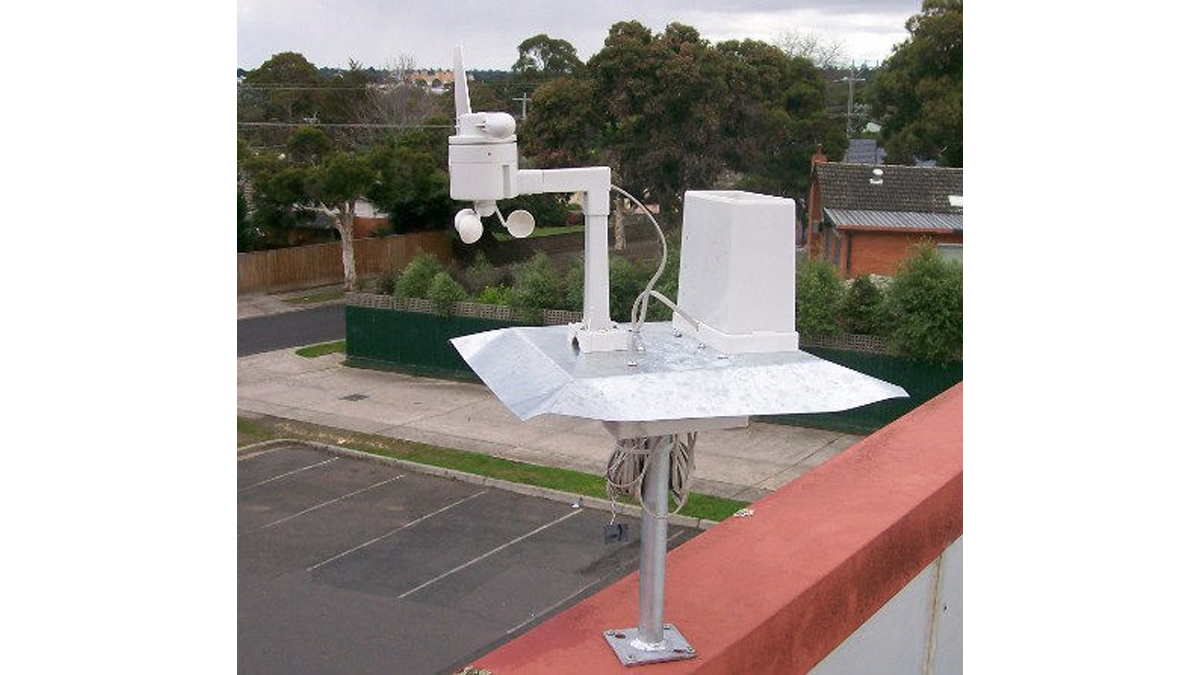
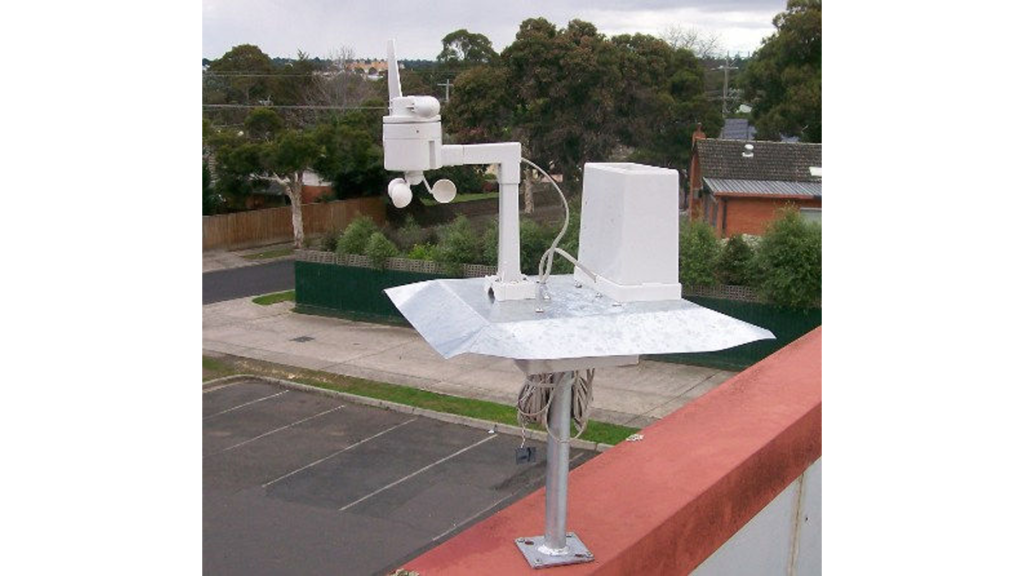
Home weather stations typically consist of two major parts: the sensors that sit outside and measure temperature, wind speed and direction, humidity, rainfall, and barometric pressure; and the display unit that lives inside in a convenient place so you can read the external temperature while sitting around the fire warming your feet and deciding whether it’s too cold to go fishing. Generally the external sensors connect together with cables with one sensor also acting as a transmitter to send updates wirelessly to the display unit.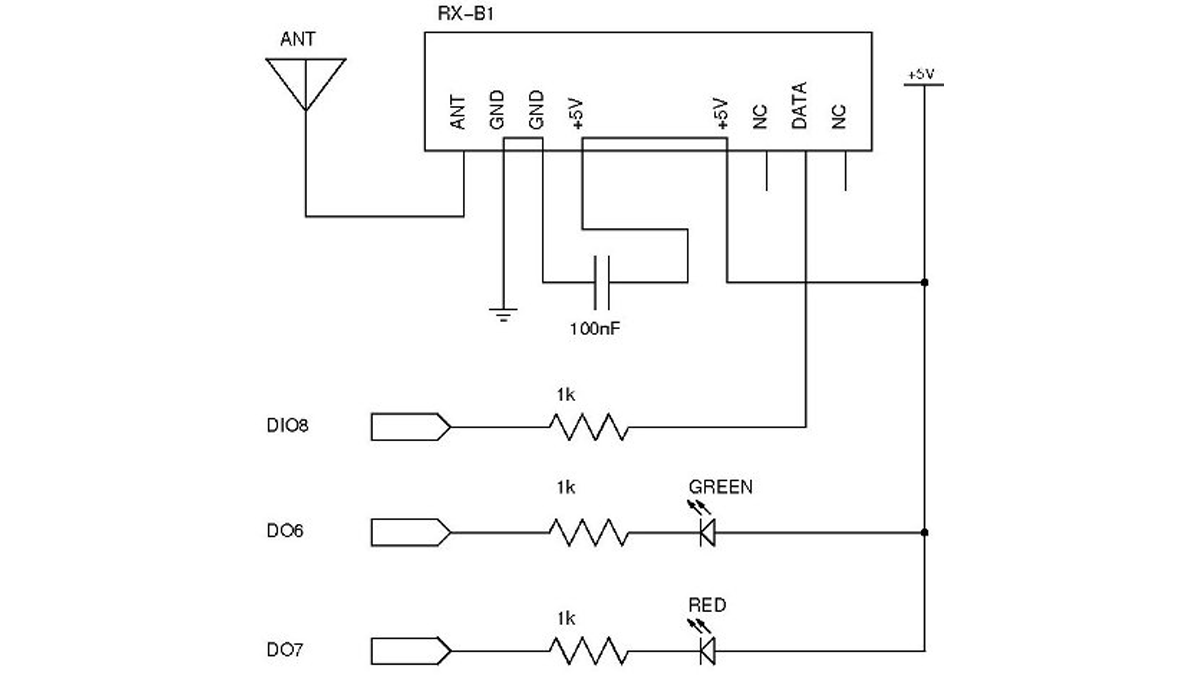
Many weather stations transmit their data at approximately 433MHz using a band reserved for low-power unlicensed use, which is ideal from a hacker’s perspective because 433MHz receiver modules are commonly available for about US$10 and can be easily interfaced with an Arduino to let you eavesdrop on the data feed. In fact it’s not just weather stations that use this approach: many short-range wireless devices work on the same 433Mhz band so the techniques used in this project can be just as easily applied to intercepting data from other devices such as domestic power consumption monitoring systems. Best of all there’s no modification required to the original device because it just transmits its data as usual, not even aware that it’s being received and interpreted by another device. This project is essentially an exercise in listening to an unknown wireless data feed and converting the raw stream of data into values that make sense.
Once you can receive the data and process it in your Arduino there are a wide range of things you can do with the information: you can simply display it as it updates, or you can log the readings and generate reports of trends over time, or you can even use it as the basis for making decisions such as sending rainfall data to an irrigation system to minimize water usage.
For this project we used a weather station from La Crosse, a popular brand that seems to be available in many parts of the world, but the same approach should work with other brands – as long as you can work out the data format!
Read more: Weather Station Receiver using Arduino