The Particle Photon is a microcontroller suitable for wearable project’s considering it’s small form factor and that it supports OTA updates. For those of you who do not know what a Particle Photon is it is a tiny microcontroller with on board WiFi (Cypress WiFi chip) and the STM32 ARM Cortex M3 microcontroller, which is ideal for cool IoT related projects.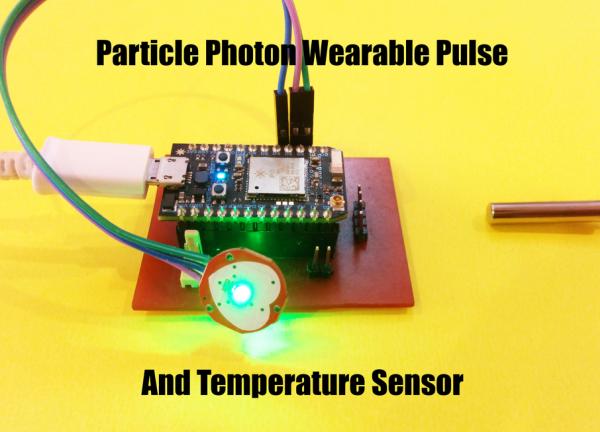
In this instructable I’m going to show you how to make one such wearable device using the photon, this project will show you how to measure Pulse rate and temperature of a person and display it live time on a web page. The project is small and portable so you can carry it in your pocket or strap it on to your hand.
Step 1: Tools and Components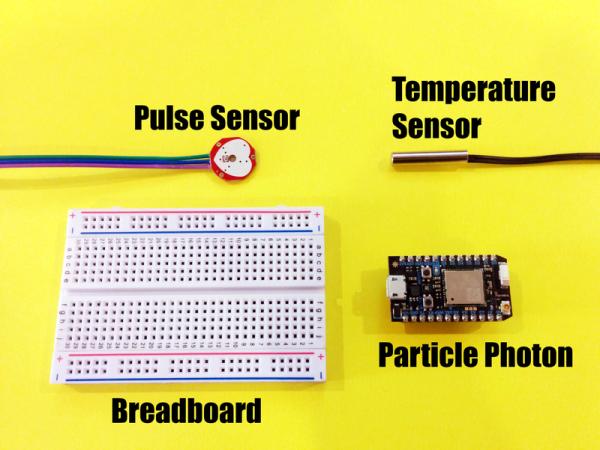
For this project you will need
- Particle Photon
- BreadBoard
- Pulse Sensor
- Resistance
- Temperature Detector
- Connecting Wires
- MicroUSB Cable
Note- The particle photon come with the breadboard and microUSB cable in the box.
Step 2: Connect to the Particle Cloud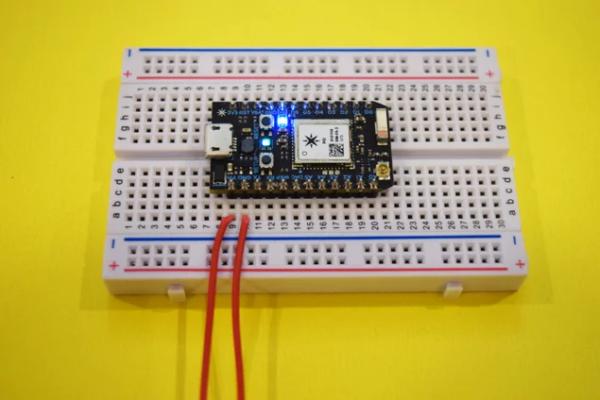
If you just ordered a brand new photon the first step is getting it connected to the internet and the Particle Cloud. All you need for this step is to download the particle app for android or your apple device. Create a user account in the app and login into it.
Once you login you should see the option to add a new device, follow the on screen instructions to add the photon to your account and also get it connected to your WiFi network. Once connected to the internet, you should see the on board LED blink cyan, and after a successful connection to the particle cloud you should see it breathing cyan.
Step 3: Circuit
The circuit is very simple just follow the circuit diagram and assemble it on a bread board. The signal pin of the pulse sensor is connected to the photon analog pin 2, and the temperature sensor is connected to photon analog pin 3.
You must change the code to match the calibration of your temperature sensor, by doing appropriate calibrations to the the variable temp.
Step 4: Code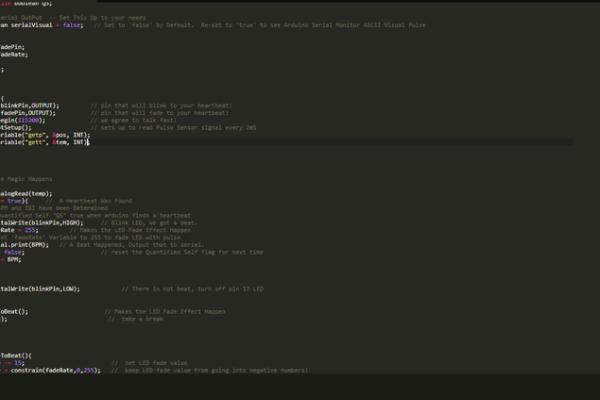
The code for this project can be found below feel free to make changes to the code and to share what you built int the comments below.
The code creates two variables
- getp which stores the value of the pulse rate
- gett which stores the temperature
You can use particle cloud APIs to read the values of these variables (Make sure to replace the device id and access token based on your values)-
https://api.particle.io/v1/devices/0123456789abcde...
Gives the pulse rate
https://api.particle.io/v1/devices/0123456789abcde...
Gives the temperature
extern void interruptSetup(void);extern int pulsePin;
extern int blinkPin;
extern volatile int BPM;;
extern volatile int Signal;;
extern volatile int IBI;
extern volatile boolean Pulse;
extern volatile boolean QS;// Regards Serial OutPut  -- Set This Up to your needs
static boolean serialVisual = false;   // Set to 'false' by Default.  Re-set to 'true' to see Arduino Serial Monitor ASCII Visual Pulse extern int fadePin;
extern int fadeRate;int temp = 3;int pos = 0; void setup(){
	pinMode(blinkPin,OUTPUT);         // pin that will blink to your heartbeat!
	pinMode(fadePin,OUTPUT);          // pin that will fade to your heartbeat!
	Serial.begin(115200);             // we agree to talk fast!
	interruptSetup();                 // sets up to read Pulse Sensor signal every 2mS
	Spark.variable("getp", &pos, INT);
	Spark.variable("gett", &tem, INT);
}//  Where the Magic Happens
void loop(){
	tem = analogRead(temp);
	if (QS == true){     //  A Heartbeat Was Found
		// BPM and IBI have been Determined
		// Quantified Self "QS" true when arduino finds a heartbeat
		digitalWrite(blinkPin,HIGH);     // Blink LED, we got a beat.
		fadeRate = 255;         // Makes the LED Fade Effect Happen
		// Set 'fadeRate' Variable to 255 to fade LED with pulse
		Serial.print(BPM);   // A Beat Happened, Output that to serial.
		QS = false;                      // reset the Quantified Self flag for next time
		pos = BPM;
	}
	else { 		digitalWrite(blinkPin,LOW);            // There is not beat, turn off pin 13 LED
	}

	ledFadeToBeat();                      // Makes the LED Fade Effect Happen
	delay(20);                             //  take a break
}void ledFadeToBeat(){
	fadeRate -= 15;                         //  set LED fade value
	fadeRate = constrain(fadeRate,0,255);   //  keep LED fade value from going into negative numbers!
	analogWrite(fadePin,fadeRate);          //  fade LED
}
Step 5: Going Further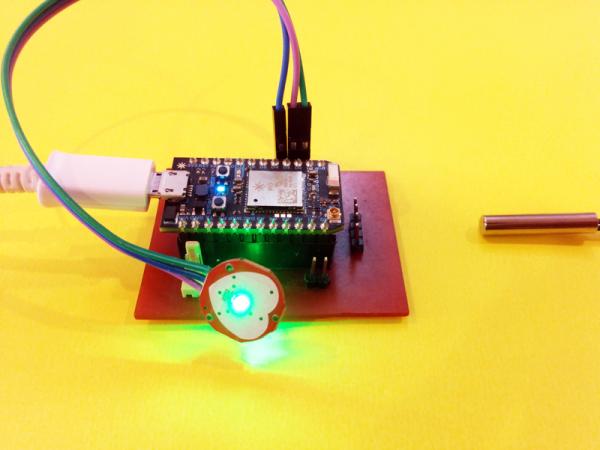
Read more: Particle Photon – Wearable Pulse and Temperature Sensor