I got my start in microcontrollers with the Arduino, as many of us outside of electrical engineering did. (And still do!) The ease of programming that little board makes it a great gateway… and like any gateway, sometimes you go through.
Most of my projects now don’t use Arduinos directly. For simple microcontroller applications, it’s much more cost-effective to use a bare microcontroller selected for the memory size and pin-count you need to do the job. For me, that usually means either the 8-pin ATtiny45/85 or the 14-pin ATtiny44/84. Both can now be programmed directly using the Arduino IDE with either a commercial programmer or with an Arduino, as described on the excellent MIT High-Low Tech site.
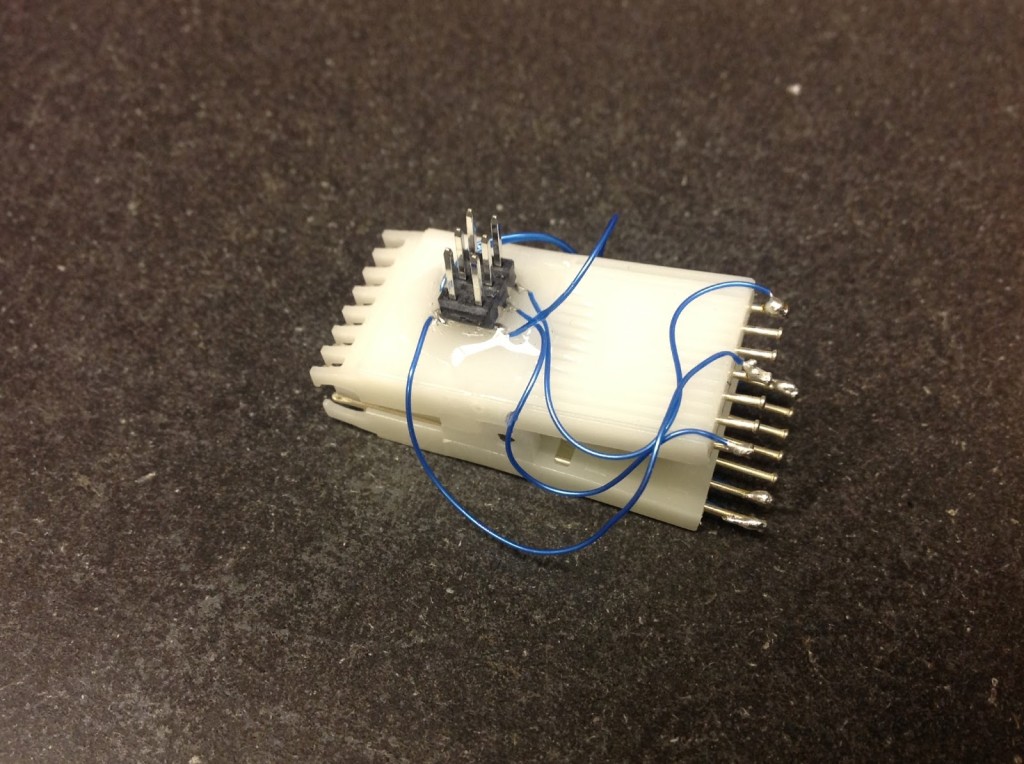
One frustration with these smaller microprocessors, though, is that I either had to take them out of the circuit and wire up a breadboard as shown at MIT’s site, or build a 6-pin ISP connector into my project. I built a 6-pin ISP-to-breadboard adapter assembly, which often helped during the prototyping process, but it was not ideal. What I really wanted was something that would clip directly to the chip and let me reprogram it without removing it from the breadboard or circuit.
It turns out the solution had been sitting in my toolbox for the last 15 years, I just didn’t know it! Years ago, someone gave me a set of “DIP clips”: they’re a spring-loaded clip made by 3M that grabs a DIP chip from the top and provides easy contact points to each pin. They’re still sold here and elsewhere. I glued a 6-pin ISP header on the side of one of these with wires from the ISP header to the appropriate pins on the clip, and voila! A ISP clip.
Read more: ISP Clip for ATtiny44/84 (or others!)