Let’s make a simple inverted balancing robot, and operate it.
You need only half a day to do them, if you have an arduino and some materials.
[a video of a robot you would make]
introduction:
After a few work with arduino, I have thought of making an inverted pendulum. Then I had two policies for the project.
- simple as possible
- bootstrap (without referring to website)
Though they has been kept (*1), it has demanded more than whole a week to make my robot balance itself. So simplicity of my robot seem to be held in its body, circuit and program (called ‘sketch’). It has only an analog gyro-module (at $4 (*2)), two plane motors (at $1.5) and two analog ICs (at $1.5) to drive these motors.
(*1) I have referred websites for two matters; a formula for inverted pendulum and a troubleshooting the gyro-module I used.
(*2) 100 JPY = 1 USD I use as exchange rate.
A solderless breadboard in a picture above would show its simplicity. And a video thereunder shows it works well enough.
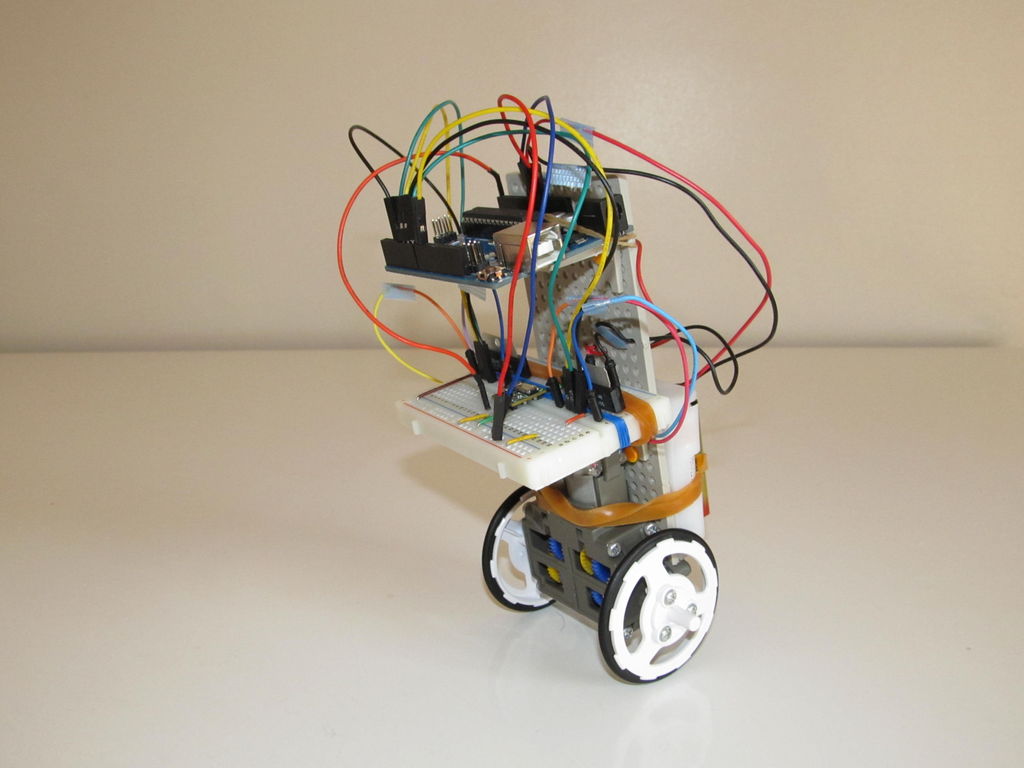
One who has made a LED blink with arduino ever could assemble her/his inverted robot in half a day or less according to my recipe below. But I think it is similar to solving a puzzle to make it balance on its wheels. Thus I show a solution in three steps not to spoil a puzzle. I wish videos and pictures could cover my poor English.
* A Japanese version of this instructable is available also.
** Additional information, Aug. 20 2014:
A simpler alternative program, ver2.0, has been available in Step 5.
Step 1: Gather Materials
Body (using TAMIYA’s Educational Construction Series)
- a Universal Plate Set (2pcs.)
- a Universal Arm Set
- a Double Gearbox (Left/Right Independent 4-Speed, two DC motors included)
- a Slim Tire Set (36mm, 55mm Dia.)
Electrics
- an arduino UNO
- a small solderless breadboard
- some jumper wires
- two motor driver ICs (TOSHIBA TA7291P)
- a gyro-module (Akizuki-denshi K-04912: sensor ENC-03R on this module)
- four AA batteries
- a 4AA battery holder
- a 9V battery (PP3)
- two battery snaps
- some rubber bands
[tutorial for Step 1]
[commentary 1]
I have felt that analog gyro-module listed above has individual difference. So I think it better to purchase two or three modules together. And as showing in Step 11, an additional module could make robot work more stably.
[commentary 2]
If it is hard to get the gyro-module listed above, similar one with the same analog sensor (ENC-03R) might be substituted. For example a module sold online would be available. (Its price is near 4 times to Akizuki’s one.) Though it seems to have op amp, the factor scale to amplify I cannot find.
Step 2: Solder Wires to Some Components
First you should solder wires to some electrical components.
- solder wire to each point of 2 motors (4 points in all)
- cut 4 jumper wires in half (8 half jumpers gotten)
- solder these half jumpers to 8 wires of 2 motors and 2 battery snaps
- cover each point soldered with chip of tape for insulation
- solder header pins to an Akizuki’s gyro-module
- solder a fine wire to either point of a capacitor ‘C6’ on this module
[tutorial for Step 2]
[note 1]
An Akizuki’s gyro-module listed above has 2 analog gyro-sensors on its surface. Either sensor is ‘ENC-03R‘ made by Murata-seisakusyo. Only one of them is used for inverted robot. This sensor outputs 0.67mV per unit angular velocity (1deg/sec) and it is amplified to ten times with a op amp on the reverse face of the module. (Vo at pin 1 of this module is 6.7mV/dig/sec.)
But this module picks up not only angular velocity but also angular acceleration by its filter (HPF). Capacitor C6 on this module is a main element of HPF. To avoid picking up the latter, soldering a wire to this capacitor is done.
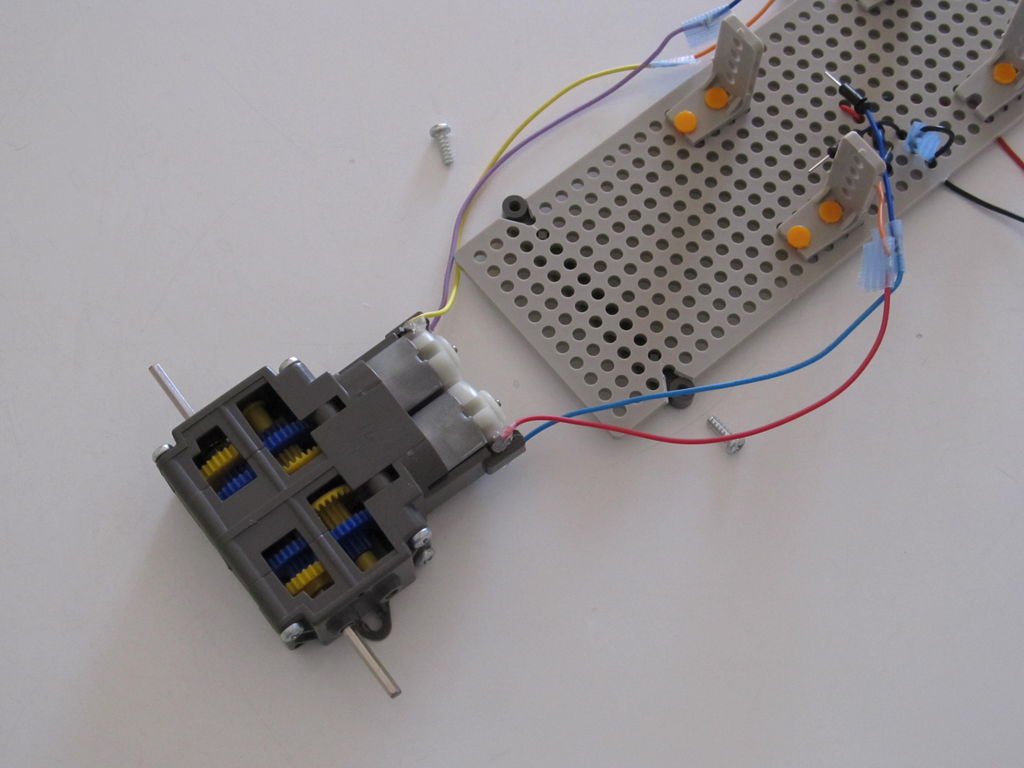
Step 3: Assemble a Body of Robot
To build a body of inverted robot, TAMIYA’s Educational Construction Series are used.
- make two V-shaped cuts to a Universal Plate
- attach 4 L-angles included Universal Arm Set to this Plate
- assemble Double Gearbox to make its gear ratio 114.7:1
- mount 2 motors with 4 wires to this Gearbox
- attach this Gearbox to Universal Plate above
- assemble Slim Tire Set (two 55mm Dia. wheels gotten)
- attach these wheels to shafts of Gearbox above
Read more: A Simple and Very Easy Inverted Pendulum Balancing Robot